

How Do You Tape Off A Diamond Shape Carpet To Paint
The porch floor is done and I have officially moved my furniture out at that place as of Saturday. You lot volition take to expect a bit to see information technology all, since I'm still spray painting things and getting information technology all accessorized, but I'm one happy girl! In the meantime, I'grand sharing how I painted diamonds on the floor.
I take long been a fan of painting diamonds on the floor and when ii of my friends did information technology on their screened porches ages ago, I knew that I wanted it on mine too. In fact, I painted years ago the floor of my tiny porch at my old house hither in GA. That was my first screened porch and I've wanted ane always since. At present I take an fifty-fifty bigger i, not huge, only certainly adequate. My porch now is virtually x 10 14 feet and enough big enough for my needs.
I only love diamonds on the porch, it gives the feeling of spaciousness and whimsy and just makes a nice argument under rugs. So, I took the time and attempt to add diamonds to my new porch and male child, am I in love all over again!

Here's the finished product and I'grand going to share how I did it! It's really not hard and you don't take to exist a math genius, because I'm certainly non that. Math is non my strong suit, but with a little planning, yous can get a great wait with squares or diamonds or what e'er you want to call them.
So, get set and I'll evidence you each stride I took to pigment my porch floor.

First, I took a cardboard box and cutting information technology apart, making sure it was big enough. I wanted eighteen" squares, that's a expert size for my porch. I took my dad's foursquare and made sure I got information technology square for my template.

18" square cardboard template. It is not perfect effectually the edges, simply you just want to describe a pencil line with this so information technology's fine. You could also go an 18" square piece of tile, only that is a lot bulkier and heavy to piece of work with. I've besides seen information technology recommended to snap chalk lines and intersect them for your diamonds, but I decided the template was better for me. I did use a chalk line in my laundry room stripes project.

I found the heart indicate of my porch flooring and marked it with pencil.

Then I placed my template right on that marking with the marking in the eye and turned the template on the diagonal. I love diagonal squares, it just gives more than movement and looks better.

I began tracing the outset square with pencil marks, then moved the template out and kept marking until I had one corner of the porch all covered with pencil lines. Equally long equally you keep lining up your sides and continue the corners adequately straight, you lot tin only go along moving the template out and mark all the pencil lines. That office comes together pretty fast. Starting in the middle also keeps your squares pretty fifty-fifty all around the edges of the room.

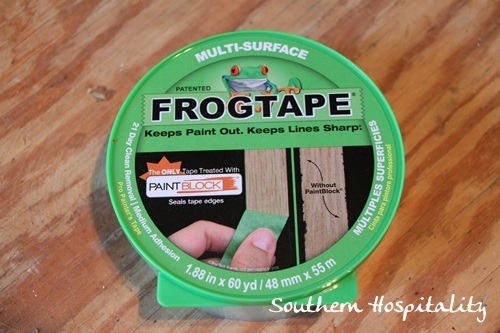
So, I got my Frogtape and began taping off the long lines. This part gets a little tricky then stay with me.

I taped off all the straight lines and then went dorsum and started on the diagonal lines.

The tricky part is that you will cover some squares that you want to paint and you will have to move the tape to get to all the squares.

All taped off and set to paint.

I used the same pigment I used in my laundry room, Sherwin Williams Porch and Floor paint. This color is a squeamish grey called Cityscape. I had already done 2 coats of Sherwin Williams Alabaster on the flooring earlier. One tip too is to try to pigment downward in the cracks if you are painting an one-time deck floor. It does have a trivial more time, only looks more finished. Mine isn't perfect but it's pretty well covered in the cracks too. I used a small foam roller and a small-scale pigment brush for this project.

I began past painting my eye square and working out from at that place, always mentally looking ahead and skipping white squares to the side by side grayness square, every other square will be grey, working upward and out. Now this is the catchy part. You always demand to tape exterior the pencil line of the square you are going to be painting and when you lot start taping like this, you are not going to be able to paint every square. I had to go dorsum and make full in the edges of some squares that I had covered with tape. At that place's no way to completely get around this part. Yous could do one row at a time and then move over and tape and paint the next row after the first one has dried, simply I was trying to comprehend more area at one time (as usual, I try to accept shortcuts!). So, I skipped around and painted as many squares equally I could with the tape I put downwards, going back and painting two coats (the first coat dries fast). Once two coats were complete, I ripped upwards my tape, so that I could continue with the squares I had missed.
I would caution here to probably only do one row at a fourth dimension with this method as information technology does make you get dorsum and retape some squares to move things forth faster. I did brand it all work even if I did have to go back and tape the edges of some of my squares in lodge to paint them. Work in sections and get both coats painted earlier you rip up the tape. It starts to dry fast so y'all tin continue working a row at a time until y'all get i section done.

With an uneven floor like this, the boards are not completely apartment and the cracks make it impossible to become the tape downwardly completely flat and as dandy equally Frogtape is, at that place is no fashion to avert some bleeding and dripping in the cracks. Only, the Frogtape certainly saves a lot of fourth dimension! I would highly recommend taping, it'southward a lot easier to tape commencement, roll with a pocket-sized roller and then become dorsum and touch on up your squares.

Hither's a square later the record is removed.

You can run across bleeding peculiarly on the curved parts of the boards. There is no way to avert this part using a roller, which makes things go faster.

My first day of painting squares, I got this far, with two coats on each square.

At the finish of day ii, I took a modest craft brush with my white pigment and went back and touched up any areas that were actually continuing out. Once you lot touch upward with white, things look actually good then. You can exist equally detail as you want at this point, touching up all over. When you stand up back and look at the finish, it will expect fantastic and no i will see all those little imperfections.

And here's the finished product! I just absolutely love it. It was a few days work to get it all done, merely well worth it. Touching up all the diamonds was i of the nearly time consuming role, but it actually looks great now.

I'one thousand and then glad I took the fourth dimension to practise this project, it'south going to make a huge departure to the experience of the room.

And it's a project that anyone can do! I promise, it'southward not that hard at all. Just takes patience and time to stop. Taping and using the foam roller is a big time saver too, so definitely do that if you are going to tackle this project.
What do you remember? Would this be something you would attempt yourself? Information technology's a great blindside for your buck project!
I'll share the finished porch as soon as I tin can. Notwithstanding working on $.25 and pieces of information technology and I want to testify it all done! I'm absolutely loving it and then far, this is like having a whole new room on the house. We still accept some finish trim to do on the stairs and outside the screens, just the screening is upwardly and finished too. I was waiting for that to exist washed to movement my furniture on the porch.

Disclosure: I'm a Brand Ambassador for Frogtape and am compensated to share my projects using FrogTape. All opinions and methods of using the product are all my own.
Don't Miss a Post, join my list!

Source: https://southernhospitalityblog.com/how-to-paint-diamonds-on-the-floor/
Posted by: lealconsel.blogspot.com
0 Response to "How Do You Tape Off A Diamond Shape Carpet To Paint"
Post a Comment