

How To Paint Motorcycle Tank And Fenders
Whether you're trying to relieve a few bucks, or you only like the claiming of doing everything yourself, at some point you'll probably consider painting your own motorcycle. But not everyone has their own air compressor at dwelling, or a spray berth and a decent spray gun.
But who says y'all tin't paint a motorcycle in your home store with droplets paint? Okay, you might non get the aforementioned result as a professional person painter with a spray booth. It won't be every bit durable every bit modern, two-part automotive paint. And yous'll probably spend fourth dimension and money stripping information technology off and sending information technology to a professional after y'all change your mind.
But if you lot want to learn some new skills, go a perfect color match, and get the satisfaction of doing it yourself, stick with me and speed upwards your learning bend.
Y'all can get an acceptable result painting in your home store, if you acquire, exercise and follow a process. So I've broken my process down into vi steps: we'll comprehend the outset three this calendar week, and the residue next time.
Before y'all commencement, exist certain to talk to your local auto body supplier for detailed product information and recommendations. After you've read this article, you should be able to inquire intelligent questions.
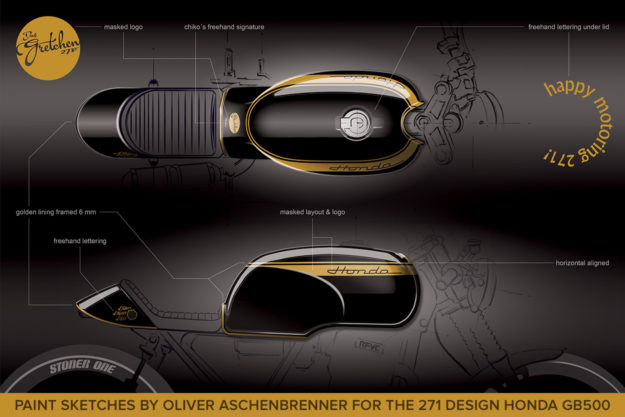
Step 1: Retrieve almost the final finish What color scheme does your project take? Will it have lettering, decals, patterns or lines? Chip or flat color? Gloss or matte?
One time you have a concluding cease in mind, it will help make up one's mind the painting process and products needed. A crude design of your pigment scheme volition help you plan the painting steps, so don't exist afraid to make a sketch with your blueprint drawn in.
Step 2: Choose a paint organization Assuming you don't accept an air compressor for this process, your paint selection is a fiddling limited. Then allow'due south cover some terminology that you might hear around paint technology.
Unmarried stage paint is a paint where the colour and the gloss are achieved with a single paint blanket. Two-phase paints require ane pigment layer for the color, and some other for the protective clear glaze (which could exist gloss or matte). These two-stage products are normally called base of operations coat/articulate coat systems.
1K coatings are coatings that exercise not require a hardener, activator or other product to cure. Firm paint is a basic example of such a product; one-shot pinstriping enamel is some other. (Most aerosol paint falls into this category too.)
2K coatings are products mixed with a hardener simply prior to spraying, and then as to activate a chemical reaction during drying. This provides a durable finished surface much less susceptible to impairment from weather, UV rays, fuel or chemicals. Your average body shop volition exist spraying a 2K end on modernistic cars in their spray berth.
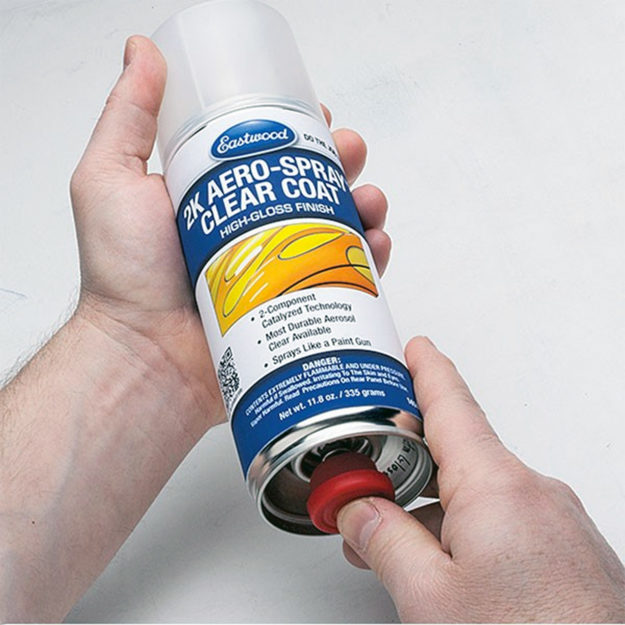
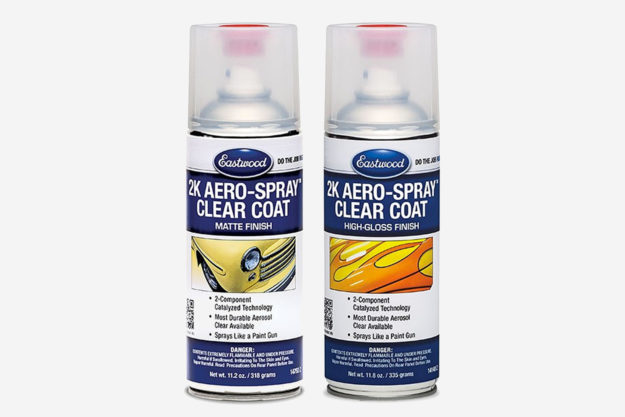
As with everything, at that place are exceptions. Some vendors tin can supply an aerosol can that delivers a 2K clear glaze. They manage this with a split up sleeping room in the tin can that contains the hardener. Correct earlier spraying, you actuate the hardener supply and it mixes with the clear coat. You and then have a limited window to spray the clear glaze earlier the paint in the can 'goes off.'
And, of grade, you could have a two-stage paint organisation with a 1K base of operations glaze (color) and a 2k clear coat. Online sources like Eastwood are a great place to outset investigating your options.
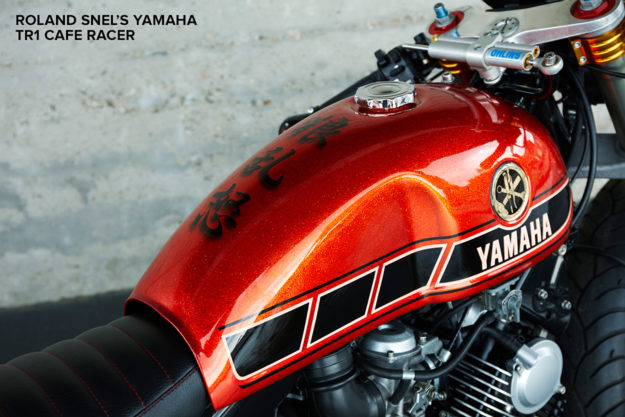
For a personal projection, I painted my Kawasaki Ninja ZX-9R motorcycle in black and gilt, with a 1K base glaze, and a 2K matte clear coat over an eBay sticker kit.
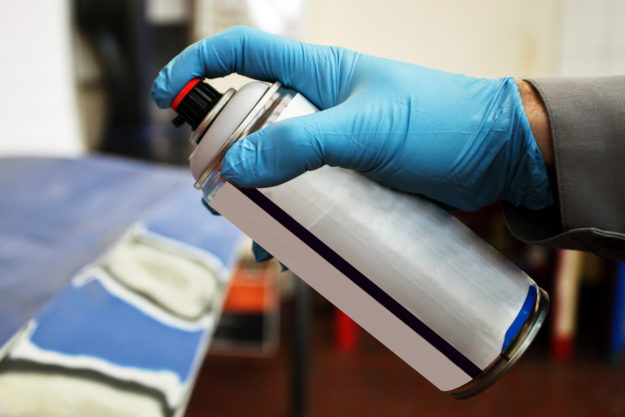
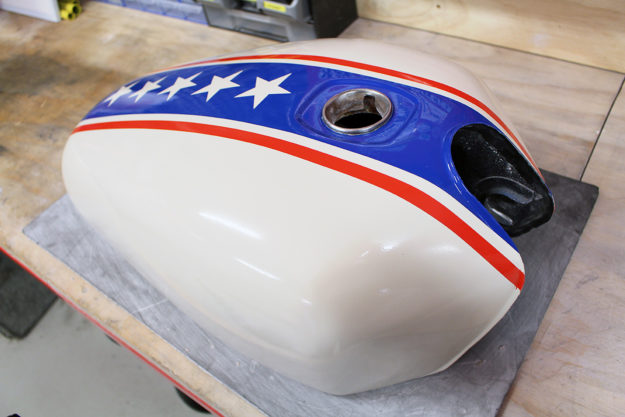
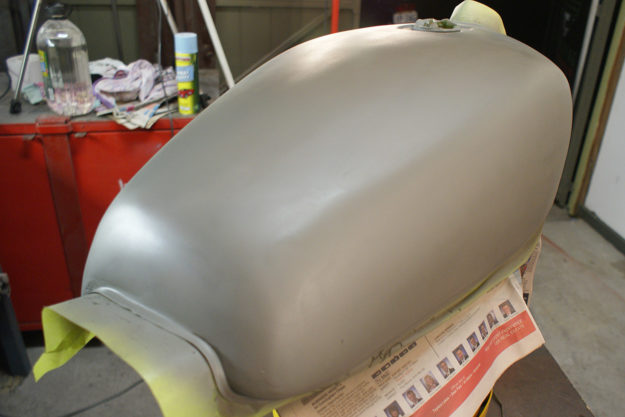
The fuel tank you see in a higher place I painted especially for this commodity. I used a high-quality (read: relatively expensive) enamel droplets paint from the hardware store, for a couple of reasons:
1. The re-coating fourth dimension was fast—about twenty minutes. I had lots of pigment to lay down, and a deadline!
2. This tank was full of rust holes, so would never go back on a bike, and would only ever be garage art.
three. It was far cheaper than a proper automotive paint.
If y'all want to tackle a project like this, I'd encourage you to practice something similar. Find a surplus tank or fender and practise some of these techniques before you aim the droplets tin can at your project bike. At worst, if information technology doesn't work out, or you don't like information technology, you can strip it off and beginning once again.
Is at that place better paint for the final terminate on your bike than hardware-store enamel? Yes! Paint product availability will vary depending on where yous are in the world, so go ask your local suppliers for advice, or bank check out the Eastwood site and their resources.
Step 3: Preparation Prep is crucial to a quality finish. My general process is: remove paint, make full, sand, prime, spray putty/filler, sand, and prime again.
Remove Pigment You tin repaint over an existing coat, whether it's on a frame or a tank. If the pigment is in good condition, y'all tin can simply scuff it upwards with 400 grit wet-and-dry out newspaper and paint over it. You lot might be taking a risk with compatibility with the original pigment, so test the existing paint first. Hold a rag soaked in full general purpose thinners on the pigment—if the thinners dissolves the existing pigment, consider stripping it off.
I much prefer to strip to bare metal regardless. I like to know what I am working with. Y'all can come across my favorite methods of removing paint in this article, but paint stripper is available in aerosol cans which might be suitable for a smaller motorbike project.
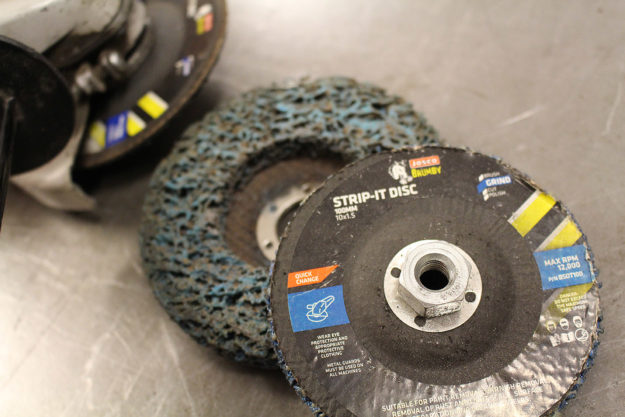
On our projection gas tank, I had previously sanded the paint off. The downside of sanding is that information technology leaves deep scratches in the metal—strip-and-clean discs are a articulate winner hither.
You may accept heard advice well-nigh preventing or neutralizing rust on your bare metallic. I normally don't bother, as I get straight to the next pace within hours of stripping the paint.
Make full On a new or reproduction tank, or on a frame, y'all might be able to skip this step. Otherwise, line upwards some automotive torso filler. This is normally a ii-part production—yous need to mix a hardener with the filler to start a reaction that cures the product.
Before mixing up the filler, put on some dispensable gloves to protect your peel. Use wax and grease remover with a clean rag, and wipe over the tank to ensure information technology is spotless and fix for the next stride.
You'll need a surface to mix the filler. Some sources advise paper-thin will absorb resins from the filler, and then I apply a $two plastic chopping board from that big Swedish furniture store. Pick up some plastic body filler spreaders; these are a buck or so. (You can utilize whatsoever potent plastic card if you're really on a upkeep.)
Follow the instructions on the product packaging. Mine said something like "mix i office hardener to l parts filler by weight." I have no idea how you'd actually do this, so I scoop out some filler with the spreader and squeeze out a thin line of hardener across it. Use the plastic spreader to continually fold the mixture into itself until it has a consistent color and texture.
You need to proceed moving now, as the filler is starting to cure. Utilize the plastic spreader to drag filler over the surface. I hold the spreader with my thumb on ane side and three fingers on the back—I tin can then curve it to match the surface improve. With a few attempts, you'll soon determine the best angle and pressure to leave a smoothen coat on the surface.
Apply a coat no more 3mm or 1/8" thick at a time. If you have a deeper paring to build up, utilize 3mm so permit it dry before applying further coats to build it upward.
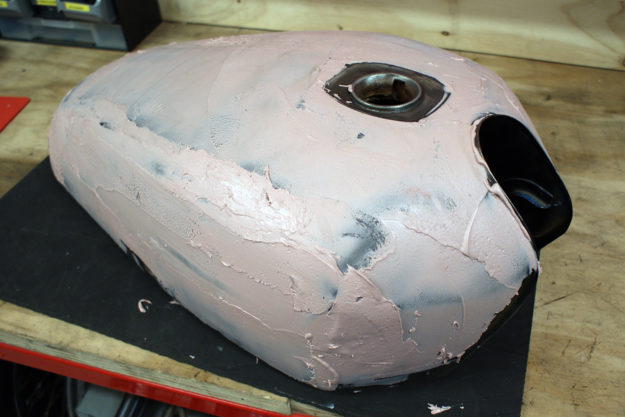
You'll find the filler getting harder to work equally the minutes pass and information technology cures. Mix up small quantities so you don't waste matter any. Aim to smooth out the filler every bit much equally possible; leaving mounds and humps will add a lot of sanding work in the next step.
Sand Once the filler has cured (around 30 minutes if all goes well), you can start sanding. I aim to remove filler every bit rapidly as possible, without leaving massive scratches that I'll have to fill over again later. My hardware store stocks 80 grit aluminum oxide newspaper in bulk rolls, so I first with this. The 80 dust doesn't get out significant scratches, and the aluminum oxide paper resists clogging.
While working on this project, I found a 5lb box of assorted grit paper, which would be a good option if y'all wanted to order online. I also use a color sanding block, which is a firm foam pad that y'all wrap your abrasive newspaper around. Rather than a difficult, directly block—which is fine for straight, flat surfaces—the color sanding block conforms to a curved surface.
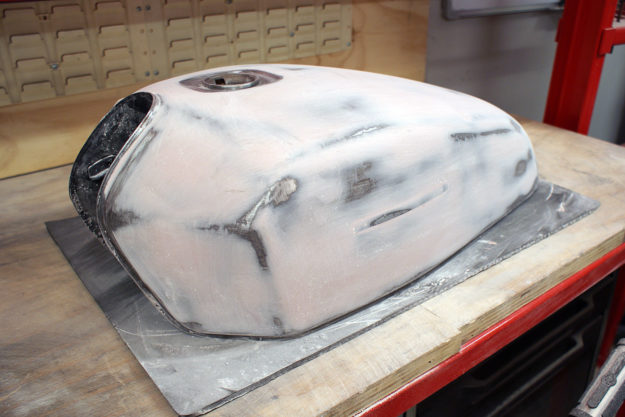
With some reasonably coarse paper wrapped around a color sanding cake, get-go smoothing out the filler. This is dusty work, so wear a dispensable grit mask. Go on working though your supply of abrasive paper until the filler is only left in the low spots, such as dents.
Run your manus, palm downwardly, over the surface. You'll feel any low spots—the filler in these areas isn't high enough to match the existing surface. Mix upwardly some more than and repeat the filling and sanding procedure.
This step volition likely take the longest, but is the foundation for your pigment finish. In the tank I painted for this article, I spent around 4 hours filling and sanding. More often than not sanding. Be aware that while it might look great at the filler stage, the offset coat of primer will actually help highlight any flaws in this step. If yous can see the flaw now, you lot can guarantee information technology will exist visible nether paint. Now is the fourth dimension to patch it with filler and smooth it out.
Before your progress to the next step, I would recommend progressively finer sanding with 120, 240, and 400 dust papers. I've found I sometimes have trouble roofing 80 grit sanding scratches in the priming and painting stages if I don't smooth the filler coat further.
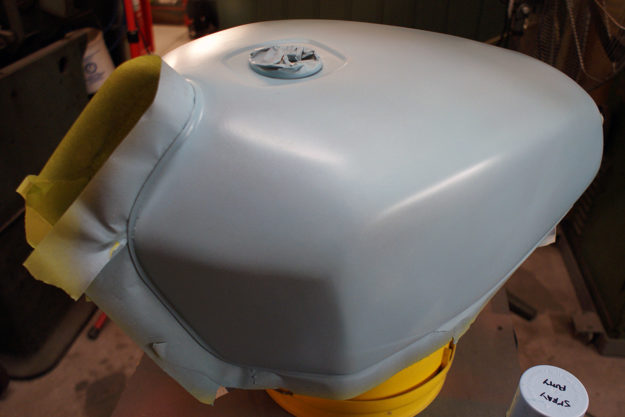
Prime A primer is used to provide a key between the surface and paint, or in this case, between the filler and pigment. Your pigment supplier volition recommend the best primer to suit your final paint stop product. The packaging will suggest how thick to lay it on, and how long you demand to expect between coats.
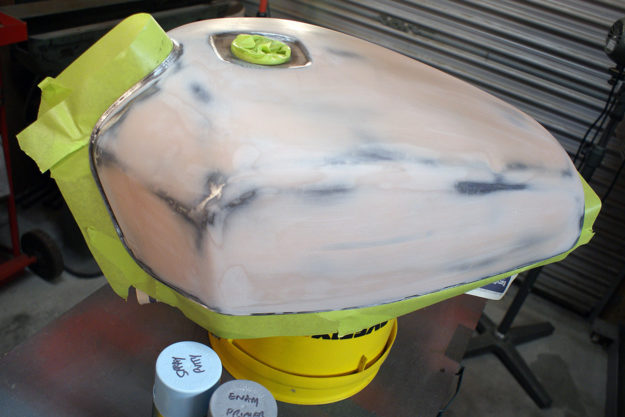
Before you shoot whatsoever primer, you'll need to utilize record to mask off any parts that don't need paint, like the fuel filler. I also mask from behind the tank seam to prevent any pigment blowing onto the underside of the tank. I use a reasonable quality painter's tape, not cheap domestic masking record.
At the accented last second earlier applying primer, or any coat for that matter, use a tack textile and wipe the surface yous're about to paint. The tack cloth volition pick upward whatever grit or dirt that has settled and minimize how much ends upward in your paint finish.
The primer you lot employ might contain some filler product to assist smooth the surface. If so, you can sand the primer. You might use a 240 dust at this stage, and then a 400 grit before the adjacent step. Taking the high spots off will level out the surface further. If yous sand back to the body filler, prime it once again before moving to the side by side pace.
If the primer doesn't contain whatsoever filler (or enough to embrace any marks) you might add the next step.
Spray putty If you lot find some pocket-size scratches in the primer, a spray putty can help fill these. Follow the product instructions—the spray putty I use suggests iii to four coats, then sanding. Once again, yous might end upward sanding the majority of the putty off, with only the putty in the low spots remaining.
Cheque your spray putty coverage and sand any marks out. Spot patch with more body filler if the spray putty didn't cover up your earlier sins. Give it a final sand and check with your hand once again. Hopefully you can't feel any more marks in the surface. If you've sanded dorsum to bare metallic, or the product recommends more primer over the putty, spray information technology on before moving to pigment. And that'due south what we'll encompass in Role 2 in a couple of weeks.
Download a costless Amazon shopping listing of supplies and consumables needed for painting a motorcycle exactly like described in this commodity here.

Source: https://www.bikeexif.com/painting-a-motorcycle
Posted by: lealconsel.blogspot.com
0 Response to "How To Paint Motorcycle Tank And Fenders"
Post a Comment